What is a Noindex, Nofollow Robots Meta Tag?
The purpose of a robots meta tag is to tell search engines how to treat a particular webpage. The noindex directive instructs search engines not to index that page and the nofollow directive instructs search engines not to follow those links on the page as well. In HTML the tag would look something like this:
<meta name="robots" content="noindex, nofollow">
Requirements
A Google Tag Manager account and a container for your website.
Some degree of experience using GTM’s dashboard (tags, triggers, and variables).
Access to publish changes in GTM.
Walkthrough
- Create a Custom HTML Tag
- Log in to Google Tag Manager
- Once in GTM, select the container for your website.
- Create a New Tag, Select Tags from the left sidebar and then click on New.
Name your tag something like “Noindex Nofollow Robots Meta Tag”. - Set Up the Tag:
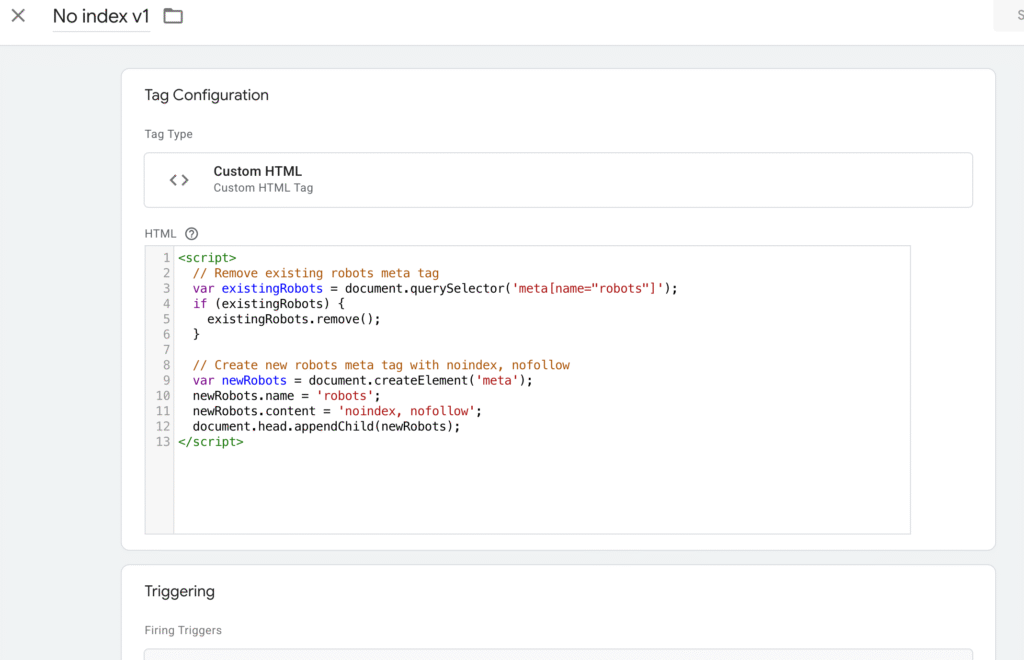
Click on Tag Configuration and select Custom HTML.Paste the following JavaScript code into the HTML field:
<script>
  // Remove existing robots meta tag, if any
  var existingRobots = document.querySelector('meta[name="robots"]');
  if (existingRobots) {
    existingRobots.remove();
  }

  // Add new robots meta tag with noindex, nofollow
  var newRobots = document.createElement('meta');
  newRobots.name = 'robots';
  newRobots.content = 'noindex, nofollow';
  document.head.appendChild(newRobots);
</script>
-
- This script:
- Checks for an existing robots meta tag and removes it to avoid conflicts.
- Creates a new
<meta name="robots" content="noindex, nofollow">tag and appends it to the<head>section of the page.
- This script:
The script looks for a pre-existing robots meta tag and removes it to eliminate conflicts and concerns
Creates a new tag and adds it to the section of the page.
Step 2: Configure a trigger
Creating a Trigger:
In the tag configuration, click on Triggering, then select New (or choose from existing trigger).
In the configuration for trigger, select Page View for the trigger type, followed by the option for Some Page Views.
Configuring the Trigger Conditions:
The condition will define the page(s) that you want the meta tag to be applied. For example:
Page URL > equals > https://example.com/thank-you-page
Alternatively, for a wider application, you could use the method Page Path > contains > /thank-you.
For multiple pages, you could use regex or insert multiple triggers to target multiple pages.
Naming and Saving the Trigger:
Name the trigger ie “Noindex page trigger” and save.
Step 3: Test the Tag
Access Preview Mode:
In GTM, click Preview to switch to debug mode.
In a new tab, open your website and navigate to the page in which the tag should fire (e.g., the thank you page).
In the GTM preview pane, verify that your custom HTML tag fires in the “Tags Fired” section.
Check the Meta Tag:
Right-click the page and select Inspect, then check the section to confirm a previous robots meta tag (e.g., ) was removed.
Step 4: Publish the Changes
Submit the Container:
To exit preview mode, click Submit in GTM. Enter a version name and description (e.g., Added noindex, nofollow meta tag for thank you page). Click Publish to publish the change.
Post-Publish Verification:
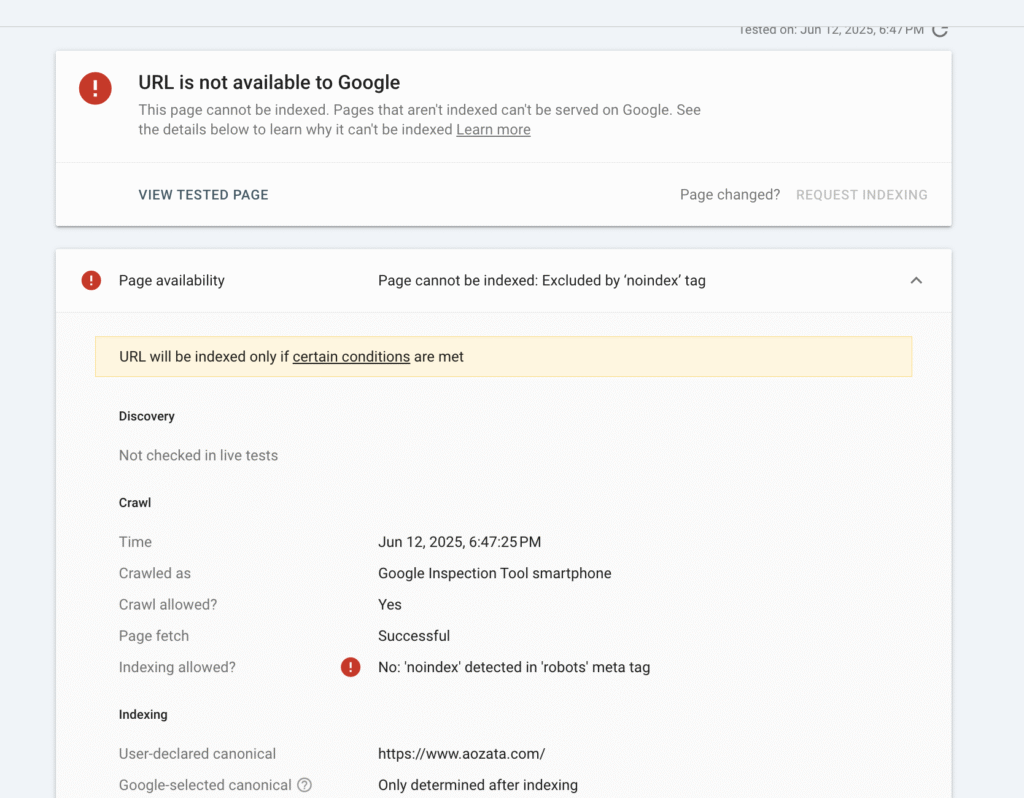
Once published, return to the target page and verify the meta tag is applied properly within your browser’s developer tools. Optionally, use tools like Google Search Console’s URL Inspection Tool to confirm the page is not indexed.